# 手把手教 Electron+vue 的使用
# Electron 是什么??
Electron 相当于一个浏览器的外壳,可以把网页程序嵌入到壳里面,可以运行在桌面上的一个程序,可以把网页打包成一个在桌面运行的程序,通俗来说就是软件,比如像 QQ、优酷、网易音乐等等。功能的强大超出你的想象,可以构建跨平台桌面程序,本身支持 node.js,可以使用 node.js 的一些模块。想要深入了解可以查看官网的详细介绍。
Electron 官网:https://electronjs.org/ (opens new window)
# Electron+vue 的联合使用
# 打包 vue 项目
npm run build
1
2
2
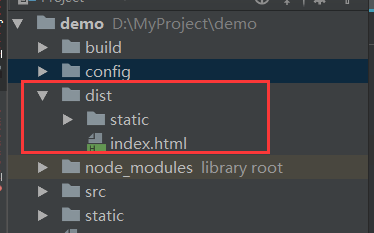
项目下回多出一个 dist 的文件夹,里面就你打包好的东西
# 安装 Electron
npm install electron -v
1
2
2
安装成功后执行:electron -v 查看一下是否安装成功

# 创建 main.js 和 package.json
在 dist 文件夹内创建主程序的入口 main.js,及相关配置 package.json
main.js
const { app, BrowserWindow } = require("electron"); //引入electron
let win;
let windowConfig = {
    width: 800,
    height: 600
}; //窗口配置程序运行窗口的大小
function createWindow() {
    win = new BrowserWindow(windowConfig); //创建一个窗口
    win.loadURL(`file://${__dirname}/index.html`); //在窗口内要展示的内容index.html 就是打包生成的index.html
    win.webContents.openDevTools(); //开启调试工具
    win.on("close", () => {
        //回收BrowserWindow对象
        win = null;
    });
    win.on("resize", () => {
        win.reload();
    });
}
app.on("ready", createWindow);
app.on("window-all-closed", () => {
    app.quit();
});
app.on("activate", () => {
    if (win == null) {
        createWindow();
    }
});
1
2
3
4
5
6
7
8
9
10
11
12
13
14
15
16
17
18
19
20
21
22
23
24
25
26
27
2
3
4
5
6
7
8
9
10
11
12
13
14
15
16
17
18
19
20
21
22
23
24
25
26
27
以上是最基本的代码,更复杂的可以自行设计,也可以看官方文档
package.json
{
"name": "demo",
"productName": "项目名称",
"author": "作者",
"version": "1.0.4", //版本号
"main": "main.js", //主文件入口
"description": "项目描述",
"scripts": {
"pack": "electron-builder --dir",
"dist": "electron-builder",
"postinstall": "electron-builder install-app-deps"
},
"build": {
"electronVersion": "1.8.4",
"win": {
"requestedExecutionLevel": "highestAvailable",
"target": [
{
"target": "nsis",
"arch": ["x64"]
}
]
},
"appId": "demo", //程序id
"artifactName": "demo-${version}-${arch}.${ext}",
"nsis": {
"artifactName": "demo-${version}-${arch}.${ext}"
},
"extraResources": [
{
"from": "./static/xxxx/", //需要打包的静态资源
"to": "app-server", //静态资源存放路径
"filter": [
"**/*" //打包静态资源文件夹内的所有文件 如果没有静态资源要打包进去,extraResources 这段代码去掉
]
}
],
"publish": [
{
"provider": "generic",
"url": "http://xxxxx/download/" //自动更新的安装包地址,初步使用publish这段代码不需要
}
]
},
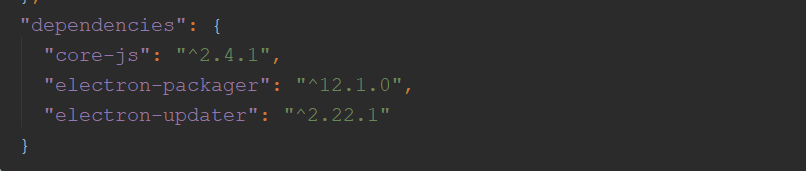
"dependencies": {
"core-js": "^2.4.1",
"electron-packager": "^12.1.0", //不打包成exe程序可以去掉
"electron-updater": "^2.22.1" //不打包成exe程序可以去掉
}
}
1
2
3
4
5
6
7
8
9
10
11
12
13
14
15
16
17
18
19
20
21
22
23
24
25
26
27
28
29
30
31
32
33
34
35
36
37
38
39
40
41
42
43
44
45
46
47
48
49
50
2
3
4
5
6
7
8
9
10
11
12
13
14
15
16
17
18
19
20
21
22
23
24
25
26
27
28
29
30
31
32
33
34
35
36
37
38
39
40
41
42
43
44
45
46
47
48
49
50
package.json 更多配置可查看官方文档:https://www.electron.build/configuration/configuration (opens new window)
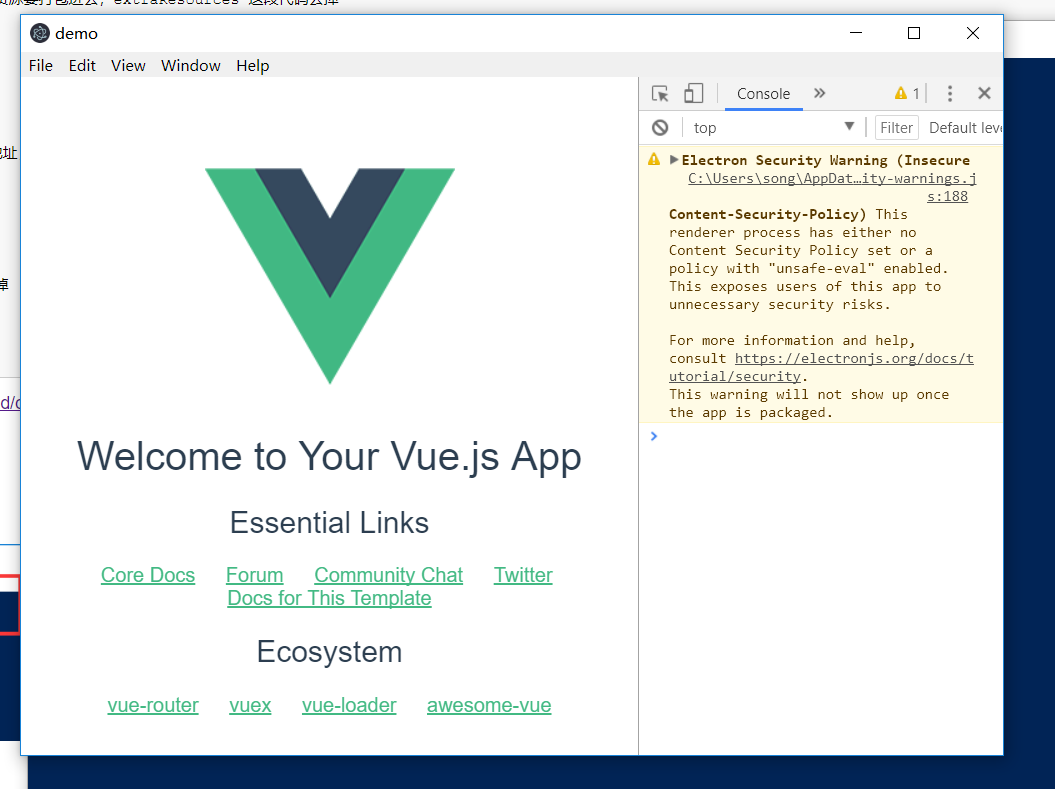
现在万事俱备只欠东风,
执行命令: electron .

成功后效果如下:
# 打包成软件包
npm install electron-builder
npm install electron-package
执行打包命令:
electron-bulider
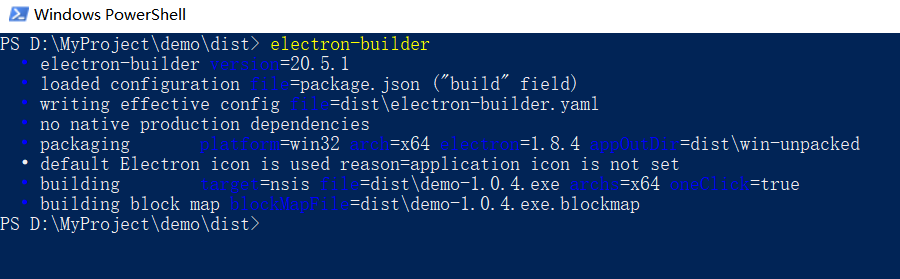
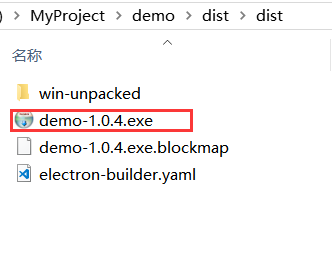
以上就是打包成功的效果,demo-1.0.4.exe 就是一个软件包,可以直接安装到系统上,不同的操作系统可以打包成不同的安装包